Showing posts with label Anglo-Zulu War. Show all posts

Saturday, February 20, 2016

Anglo-Zulu War - Battle of Kafrudum - British Army Suffers Horrible Loss


What a beautiful day today. I wanted to go for a ride on my goldwing but I had to watch my granddaughter this morning. So while she frolicked and played in the backyard I set up a small scale colonial battle on the patio. 


For this battle I used One Hour Wargame rules modified as I deem the Anglo-Zulu War should go. I gave the Zulus a +2 in melee combat. The British +2 in shooting but a 0 in melee. I reduced the hits a unit can suffer from 15 to 10. I use white beads to indicate single hits and a red bead to indicate 5 hits. I used movement in base depth vice inches or paces. Also I wanted to adhere to my wargaming advise that I have posted on the left side of the blog so the armies are based on 1" squares and are small. However in my mind there were 3 Zulu regiments vs. a British column under a colonel; in this case Colonel Reynauld Chester Higginsworth. 

The hill of Kafrudum with it's Zulu Kraal on top.
Colonel Higginsworth's plan was to use his artillery to either force the Zulus out of their kraal or soften them up enough for his cavalry troop under Captain Wortheall to capture the hill.

The artillery bombards the kraal.

The artillery battery continues to pound the hill.
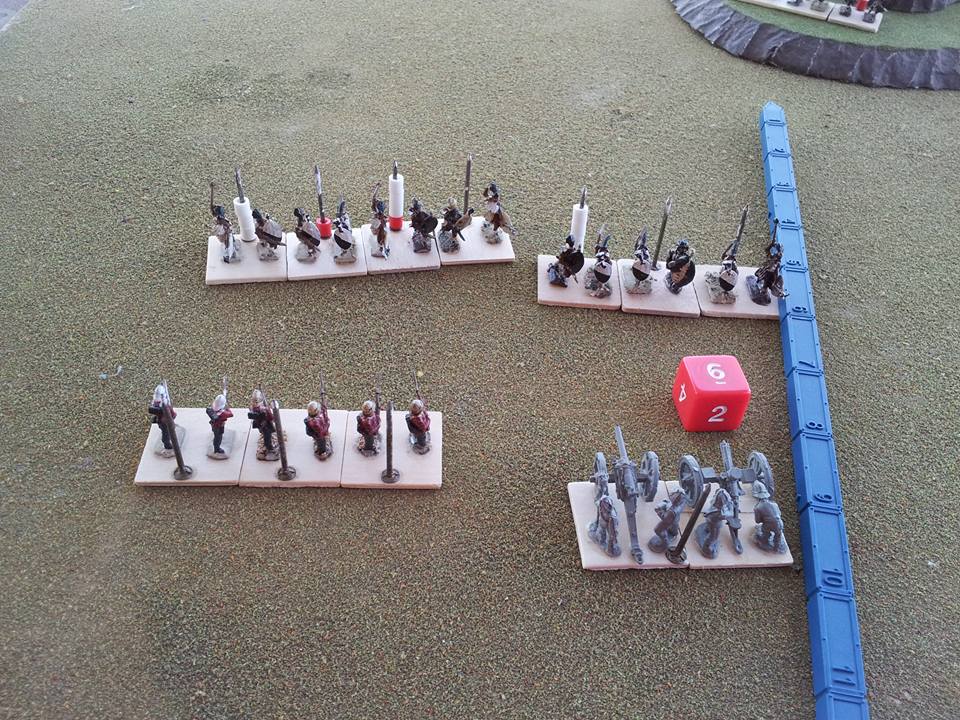
Two Zulu regiments swiftly close the gap on the red line.
British rifle & maxim fire inflict severe losses on the Zulu.


Finally hitting the British line the Zulu regiments make quick work of their enemy. 


A bugle cry brings the cavalry back around but can they make it in time?
One lone British unit withstood attacks from their front
and rear long enough to destroy their frontal enemy contact.
 They received the Victoria Cross posthumously. 


Seeing that all hope is lost Captain Wortheall and his men flee the field.

Overall I am satisfied with how fast the battle played. I like the suspense/thrill of watching the hits mount up on each unit. Though small in appearance this was the largest battle of OHW I have fought so far with 16 units (British 6, Zulus 10) on the battlefield. I'm firmly in the camp of OHW now. These are the best ease of use rules for a solo-wargamer that I've encountered thus far. The bases were bare because I'm not sure if I will continue with the 1" basing or move to a larger base to allow diorama style basing. Cheers from Northwest Arkansas.

Monday, February 15, 2016

Anglo-Zulu War: Test Battle for New Home Rules

I had the day off today so I decided to get stuck in with a couple of good playtests for some new home rules I've been working on. Well one playtest is worth at least a hundred opinions and thoughts of how a system should work. So far my combat mechanics are not satisfying to me. I suppose that One Hour Wargames has me spoiled now. The good news is that I am completely satisfied with unit movement and firing ranges. Back to the drawing board to work on combat as well as command and control.


Saturday, January 30, 2016

15mm Colonials - Test Game of New Home Rules

I have had the notion in mind for quite some time to come up with a division level set of home solo-wargame rules. But I can't seem to wrap my mind around each unit being a battalion vice a company. Anyway I've been reading a lot of other wargames and books and thought I had come up with a pretty good mesh of ideas/mechanics. However my "plans didn't survive first contact with the enemy." 

The "to hit" mechanic is straightforward for a solo-wargamer. Roll a d6 and score a target goal. Said score inflicts a single fatigue point hit on the target unit.  A command point is required to remove the hit otherwise any unit with a FP has it's capabilities nerfed.  

I had thought that each force would have a set amount of command points to activate units and rally away fatigue points (hits) but this really cripples a force once the bullets start flying. I do want it to have a tactical impact but not one that causes a side to lose completely to it. The Zulus as they drew nearer to the British line were unable to move enough of their units due to the activation spent rallying a hit unit. However that may be more accurate than I think. Perhaps I should increase the foot movement for certain types of forces, like the Zulus.

Further playtesting and more reading is required.


Thursday, March 1, 2012

HOTE Battle: Mafeking Zulus vs. 7th Foot, British Army

Traveled down to Fort Smith today to visit my son James and his bride to be Jessica. We met up for lunch and then headed over to Hawgshead Comics on Greenwood Ave for some Magic CCG games and Hordes of the Empires. Now, I apologize, but I forgot the battlefield and the rules so we had to make due from memory and this was our first go of HOTE all together.


The British Deployment

We each played with 24 points. The British Baggage Camp came from my Duchy of Saxe-Huack SYW Army, but HEY, at least were wargaming and having fun. :)

The Zulu Deployment

The first couple of turns saw the armies advance on the Mafeking plains. Sunlight glitterd off spear points and the air was pierced with the shouting of orders and marching of boots.
In the picture above James sent his Cavalry (Kn) around the hill to attack my left flank in the rear.

Above the Skirmishers followed by the Chief and 2 Warbands advance upon the woods towards the Gatling Gun. I pulled 1 Warband off to stall the Cavalry "coming round the mountain." The action on the right flank is all close order marching to battle.

James knocks out my Skirmishers but this allowed my Warband to close!

The right flank: The British enjoyed volley fire at my Zulus whom sang and danced to intimidate the enemy (low PIPs) before joining in melee.

As the above picture shows I was able to sneak a single Warband into the Baggage Camp but blast the dice the Camp Defenders won!

But next turn it was over (we played this way due to time restraints) the British General took a spear and now has a maggot hole in his belly.

Wednesday, October 5, 2011

The Zulu Impi


The Zulu Impi! 2 Generals, 9 Warbands, 2 Skirmishers and 2 dead markers. In the center front we have Chiefs Unga and Bunga. In the rear flanks are the skirmishers with captured British rifles, with one wearing a red service coat. Only 1 of the chiefs will lead the army at a time. Most likely Unga.